Learning how to make a hardcover book from the comfort of your home is easier than you might think, even if you’ve never tried bookbinding before. With just a few affordable tools and simple techniques, anyone can create a sturdy, professional-looking hardback book for journals, novels, photo albums, or personal projects. If this sounds like it’s up your alley, join us today at What We Writing as we reveal exactly how to bind a hardcover book from scratch, choose the right materials, skip common mistakes, and achieve clean, durable results. Come the end of this guide, you’ll have all the confidence and skills needed to make your own custom hardcover books that look great, last for years, and reflect your personal style!
How To Make A Hardcover Book (Quick Overview)
- Time Required: 2-4 hours (plus drying time)
- Skill level: Beginner-friendly
- Binding method: Case binding (traditional hardcover method)
- Estimated cost: Low (using basic, affordable materials)
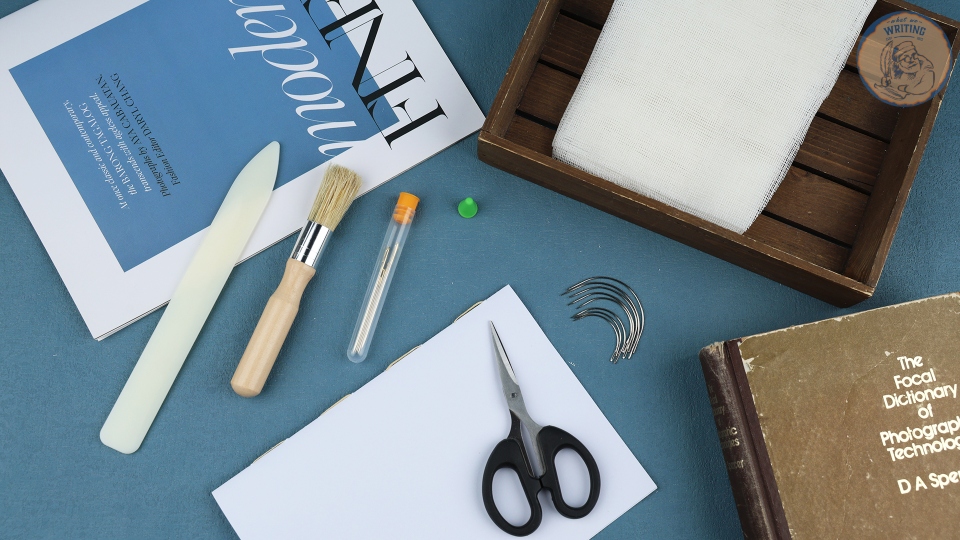
- Tools needed: Paper, cardboard, glue, needle and thread, ruler, craft knife
This DIY hardcover bookbinding method is perfect for beginners who are looking for professional-looking results without needing any expensive kit. With simple steps and readily available supplies, it’s perfectly possible to create a durable hardback book that’s more than worth housing your stories, journals, sketchbooks, or photo collections.
What Is A Hardcover Book?
First things first, let’s work out exactly what we mean when we say hardcover book.
A hardcover book (sometimes called a hardback book) is a type of book bound with rigid protective covers, typically made from thick cardboard wrapped in cloth, paper, or leather. Unlike softcover or paperback books, hardcover books are designed with durability in mind, resistant to everyday wear and tear. They are usually used for novels, journals, photo books, and special editions because of their polished appearance and sturdy construction.
One of the biggest differences between a hardcover book and a paperback is the binding technique behind them. Paperbacks typically have flexible covers and simpler glue-based bindings, which makes them lighter and cheaper to produce, albeit less durable over time. Whereas hardcover books are designed to withstand frequent use and mishandling.
Most hardcover books use a technique called case binding. In this method, the pages are first sewn or glued together to form a text block. A separate rigid cover, known as the “case,” is then made and attached to the pages using a strong adhesive. This structure lends hardbacks their strength, clean spine, and longer lifespan.
When you learn how to make a hardcover book at home, you are usually learning a simplified of this traditional case binding process.

Materials Needed For Bookbinding
Before you begin learning how to make a hardcover book, it’s important to gather the right materials. The good news here is that most DIY hardcover bookbinding supplies are perfectly affordable and easy enough to find either online or at your local craft store. You don’t need any professional equipment to get great results.
Essential Materials
These are the basic supplies you’ll need to bind a hardcover book at home:
Paper
Use some good-quality printer paper, sketch paper, or recycled pages for your book’s interior. Heavier paper (80-120 gsm) works best because it resists tearing and warping.
Cardboard
Thick, sturdy cardboard is typically used to design the front cover, back cover, and spine. Chipboard or recycled packaging boxes work best for beginners.
Book Cloth
Book cloth is a fabric-backed material designed for book covers. It provides durability and gives your hardcover book that professional finish.
Tip: If you don’t have any book cloth, tightly woven cotton fabric, canvas, or even thick wrapping paper can be used as a decent alternative here.
Glue
Use acid-free PVA glue or craft glue for best results. These dry clear and remain flexible, helping your binding last longer.
Tip: Avoid any school glue or hot glue, as they can crack or damage pages over time.
Thread
A strong thread is used to sew page sections together. Waxed linen thread is perfect, but regular embroidery thread or strong polyester thread also works for DIY projects.
Optional Tools
These tools are handy to have, but by no means essential. They make the bookbinding process easier and more precise.
Bone Folder
A bone folder is used to crease paper neatly and smooth out fabric or paper covers.
Alternative: Use the back of a spoon, a credit card, or a ruler.
Book Press
A book press is ideal for flattening pages and guarantees the glue will dry evenly.
Alternative: Stack heavy books or use clamps with wooden boards.
Cutting Mat
A cutting mat protects your work surface when trimming paper and cardboard.
Alternative: Use thick cardboard or a wooden board.
Craft Knife and Ruler
A sharp craft knife and a metal ruler help you make clean, straight cuts.
Tip: Always replace dull blades to avoid tearing materials.
Using quality materials and simple tools will make a noticeable difference in how your finished hardcover book both looks and feels. Even with the most basic supplies, you can create a strong, attractive binding that lasts for years.
How To Make A Hardcover Book (Step-By-Step)
Follow these clear, beginner-friendly steps to learn how to make a hardcover book at home using the traditional case binding method. Take your time with each stage to achieve the best results.
Step 1 – Prepare Your Pages
What to do:
Choose your book size and trim all the interior pages to the same dimensions. Arrange your pages in the correct order and stack them nice and neatly.
If you’re printing pages at home, ensure that they are double-sided and properly aligned. Tap the stack on a flat surface to even out the edges.
Why it matters:
Even, well-aligned pages create a clean spine and prevent uneven edges in your finished book.
Common mistakes:
Skipping trimming or using uneven paper sizes, which only leads to crooked pages and a messy final look.
Step 2 – Fold and Gather Signatures
What to do:
Split your pages into small groups of 4-6 sheets. Fold each of these groups in half to create “signatures.” Nest the folded sheets inside one another.
Once folded, gently press the creases using a bone folder, a spoon, or a ruler.
Why it matters:
Signatures make sewing easier and allow the book to open smoothly without cracking the spine.
Common mistake:
Using too many pages per signature, which makes sewing difficult and weakens the binding.
Step 3 – Sew the Binding
What to do:
Mark evenly spaced holes along the folded edge of each signature. Use a needle and strong thread to sew the signatures together using a simple pamphlet stitch or a kettle stitch.
Tie off the thread securely when you’re done here.
Why it matters:
Sewing holds the book together and provides long-term durability that glue can’t achieve on its own.
Common mistake:
Pulling the thread too lightly, which can tear paper or warp the spine.
Step 4 – Glue the Spine
What to do:
Clamp or hold the sewn pages tightly together. Apply a thin, even layer of PVA glue along the spine using a brush or sponge.
Allow the glue to dry completely before you move on.
Why it matters:
Gluing reinforcees the stitching and stabilises the spine, preventing pages from loosening over time.
Common mistake:
Using too much glue, which seeps between pages and causes stiffness.
Step 5 – Make the Cover
What to do:
Cut two cardboard pieces for the front and back covers and one narrow strip for the spine. Leave small gaps between them on a sheet of book cloth or fabric.
Glue the cardboard onto the cloth, fold the edges inward, and smooth everything flat.
Why it matters:
The cover protects your books and lends it a professional hardcover appearance.
Common mistake:
Forgetting to leave space between boards, which stops the book from opening properly.
Step 6 – Attach the Case
What to do:
Apply glue to the first and final pages of your book block. Carefully place the pages inside the prepared cover, ensuring that everything is centred.
Press the book closed and wipe away any excess glue.
Why it matters:
This step connects the pages to the hardcover case, forming the final structure of your book.
Common mistake:
Misaligning the pages and cover, resulting in uneven margins.
Step 7 – Press and Dry
What to do:
Place your book between clean sheets of paper and put it under heavy books or in a press. Leave it for at least 6-12 hours to completely dry.
Check in occasionally to make sure the pages aren’t sticking together.
Why it matters:
Pressing prevents warping, bubbling, and loose covers while the glue cures.
Common mistake:
Opening the book too early, which weakens the binding.
One Final Tip for Best Results
Take your time and allow for proper drying between steps. Rushing the process is the most common reason DIY hardcover books fail. With patience and careful alignment, you can create a strong, attractive book that holds for years.
Different Ways To Make A Hardcover Book
Whilst traditional case binding is easily the most common method of making hardcover books, it isn’t the only option on offer. Depending on your skill level, tools, and project type, you might prefer one of these alternative bookbinding techniques.
No-Sew Binding
No-sew binding is one of the easiest ways to make a hardcover book, making it the perfect starting point for beginners and quick projects. Rather than stitching pages together, this method depends entirely on a strong adhesive to hold the pages together.
Best for:
Journals, notebooks, and short books with just a few pages.
Pros:
- Fast and simple
- No needle or thread required
- Minimal equipment needed
Cons:
- Less durable than sewn bindings
- Pages might loosen over time
Tip: Use high-quality PVA glue and apply multiple thin layers for better strength.
Perfect Binding
Perfect binding is commonly used for paperback books, but it can also be combined with a hardback case for a sleek, modern look. In this method, pages are glued directly onto the spine without sewing.
Best for:
Novels, manuals, and printed documents.
Pros:
- Produces a smooth, square spine
- Works well for larger page counts
- Professional appearance
Cons:
- Does not open as flat as sewn books
- Requires precise glueing
Tip: Lightly roughen the spine with sandpaper before glueing to improve adhesion.
Japanese Binding
Japanese binding is a decorative technique where pages are bound together along the outer edge using visible stitching. Unlike traditional bindings, the pages are not folded.
Best for:
Sketchbooks, art books, and display projects.
Pros:
- Attractive, handmade appearance
- No folding required
- Easy for beginners to learn
Cons:
- Pages do not open fully
- Limited writing space near the spine
Tip: Use constraining thread colours to create eye-catching patterns.
Photo Book Binding
Photo book binding focuses on protecting thick, glossy pages while allowing them to lie flat. This method often combines sewing, strong adhesive, and reinforced hinges.
Best for:
Photo albums, scrapbooks, and memory books.
Pros:
- Supports heavy paper and images
- Durable and long-lasting
- Allows wider page openings
Cons:
- More time-consuming
- Requires careful alignment
Tip: Add thin spacer strips between pages to prevent photos from sticking together.
Choosing the Right Binding Method
The best way to make a hardcover book depends on your project’s purpose, page count, and desired durability. Beginners usually start with no-sew or case binding, whereas more advanced makers might opt for perfect or photo book binding for specialised projects.
By learning multiple bookbinding methods, you can adapt your approach and create custom hardcover books for any purpose.
How Much Does It Cost To Make A Hardcover Book?
One of the biggest advantages of learning how to make a hardcover book at home is that you can control both your budget and your time investment. Depending on the materials and tools you choose, DIY bookbinding can be very affordable or scaled up to a more professional level.
Here is a realistic breakdown of the most common costs and time ranges you should expect to see.
Budget Version (Beginner Setup)
Estimated cost: £5-£15 / $6-$20
Time required to complete: 2-3 hours (plus drying time)
This option uses basic household and cheap craft supplies, making it perfect for newcomers and casual hobbyists.
Typical materials:
- Printer or recycled paper
- Recycled cardboard
- Cotton fabric or wrapping paper
- PVA or craft glue
- Embroidery or sewing thread
Mid-Range Version (Hobbyist Setup)
Estimated cost: £20-£40 / $25-$50
Time required to complete: 3-4 hours (plus drying time)
A mid-range setup uses purpose-made bookbinding supplies and produces more consistent, professional-looking results.
Typical materials:
- Quality interior paper
- Chipboard
- Book cloth
- Acid-free PVA glue
- Waxed linen thread
- Bone folder
Pro Setup (Advanced / Studio Level)
Estimated cost: £60-£150+ / $75-$200+
Time required to complete: 4-6 hours (plus drying time)
A professional setup is designed for serious bookbinders, artists, and small-scale creators who want guaranteed, top-quality results.
Typical materials and tools:
- Archival-quality paper
- Professional book cloth or leather
- Book press
- Sewing frame
- Board shear or heavy-duty cutter
- Speciality adhesive
Is DIY Bookbinding Worth the Cost?
For most beginners, a budget or mid-range setup presents the best mix of cost, quality, and ease of use. As your skills improve, you can gradually upgrade your tools and materials without needing to invest heavily upfront.
Starting small lets you learn how to make a hardcover book whilst keeping the expenses low.
Wrap Up
Now that you know how to make hardcover books, you have all the tools, materials, and a step-by-step guide to create your very own durable, professional-looking hardcover. Whether you’re making a journal, a sketchbook, a photo album, or a gift for someone special, following these techniques will help you achieve clean, long-lasting results.
The best way to improve your bookbinding skills is by starting your first project today! Don’t worry about making things perfect – each book you build will help you get better.
We’d love to see your creations! Share with us photos of your finished hardcover projects in the comments below, or on our socials.
Happy bookbinding!

James has been passionate about storytelling ever since he could hold a pen. Inspired by the epic fantasy and historical dramas he devoured in his youth, his work now centers on dark, psychological tales featuring intense, introspective characters and atmospheric, gothic undertones. In 2025, he founded What We Writing to share his creative journey and the lessons he’s learned along the way with fellow writers and passionate storytellers.

